

How to Deploy a Node.js Application with xCloud
Updated October 5, 2026 · 5 min read
You can deploy a Node.js application to xCloud directly from a public or private Git repository. xCloud analyzes the repository, selects Node.js as the application type when it detects a supported Node.js project, and prepares the deployment settings for you to review.
This guide shows how to deploy an Express-style Node.js application with Deploy via Git, including the branch, runtime, serving mode, port, environment variables, build script, and post-deployment settings.
Prerequisites
Before you begin, make sure you have:
- An active xCloud account.
- A connected server with enough resources for your application.
- A Git repository containing your Node.js application.
- Access to the repository if it is private.
- A start script in
package.json, such asnpm run start, for an SSR or API application.
Step 1: Start a Deploy via Git deployment
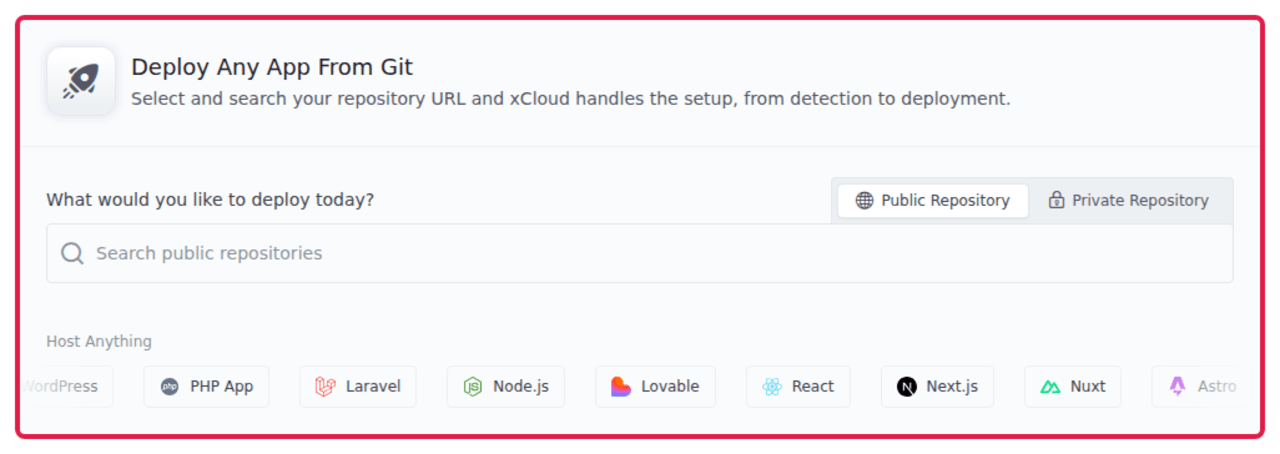
Open the target server in xCloud, select Add New Site, and choose Deploy via Git. The deployment screen lets you search for a public repository or switch to a private repository provider.
Step 2: Choose the repository and confirm the app type
Paste the repository URL or select a repository from your connected Git provider. xCloud analyzes the repository and preselects an application type.
Confirm that Node.js is selected. If the detected type is incorrect, choose Node.js manually before continuing.
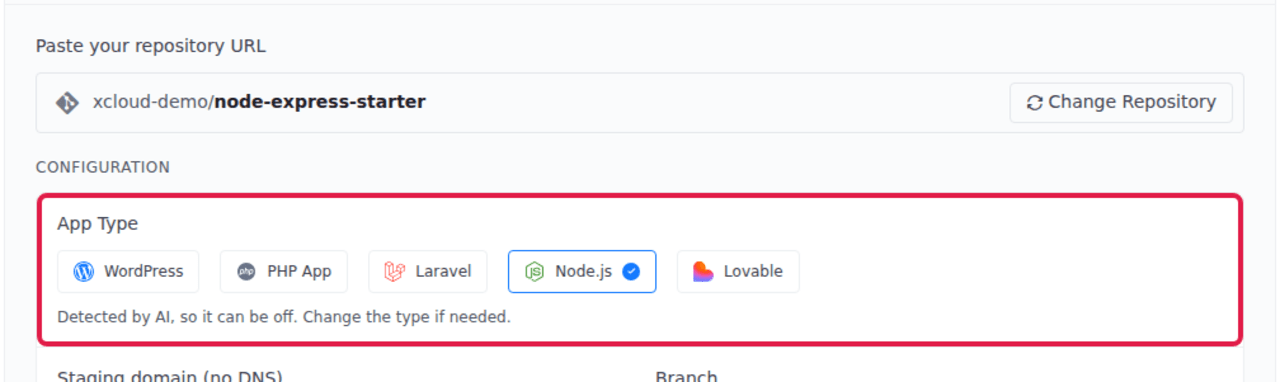
Repository detection is a starting point, not a replacement for review. Check the branch, runtime, commands, port, and environment values before deployment.
Step 3: Choose a branch and domain
Select the branch that xCloud should deploy. For the first deployment, you can use the generated Staging domain (no DNS). To deploy on your own hostname instead, select Use a live domain instead and complete the domain configuration shown in xCloud.

The staging domain is useful when you want to verify the application before changing DNS for a production domain.
Step 4: Configure how the application is served
In Build & serving, select the mode that matches the application:
| Serving mode | Use it for |
|---|---|
| SSR (Node process) | Express, NestJS, Next.js SSR, APIs, and other applications that keep a Node.js process running |
| Static | Applications that produce static files and do not need a persistent Node.js process |
| Hybrid | Applications that need both generated static assets and a running Node.js process |
For an SSR or API application, enter the command used to start the process and the port on which the application listens. The example below uses npm run start and port 3000.
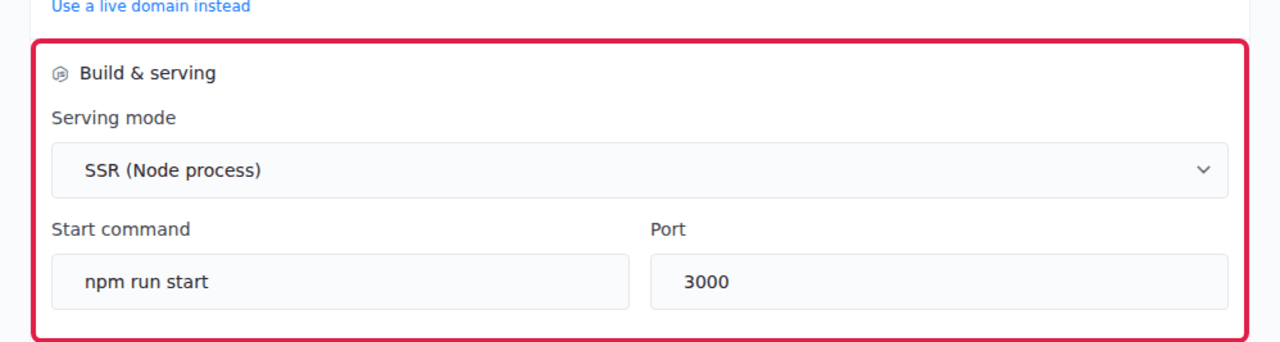
Your application must listen on the same port configured in xCloud. When the application supports it, read the port from the PORT environment variable instead of hard-coding it.
Step 5: Review the Node.js runtime
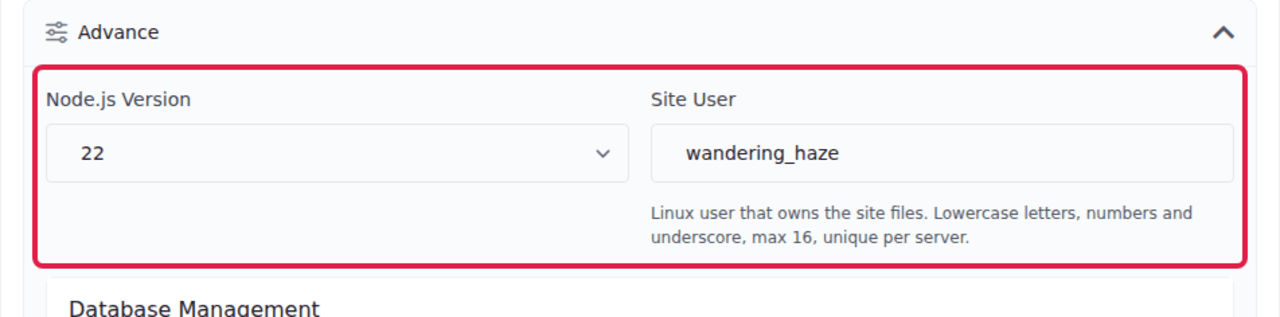
Expand Advance and confirm the Node.js Version. Choose a version supported by your application and its dependencies.
The Site User is the Linux user that owns the site files. Keep the generated value unless you have a specific naming requirement.
Step 6: Add environment variables
Use the Environment file (.env) field for non-secret and secret runtime configuration required by your application. You can also specify the repository path to the environment file when it is not located at the project root.
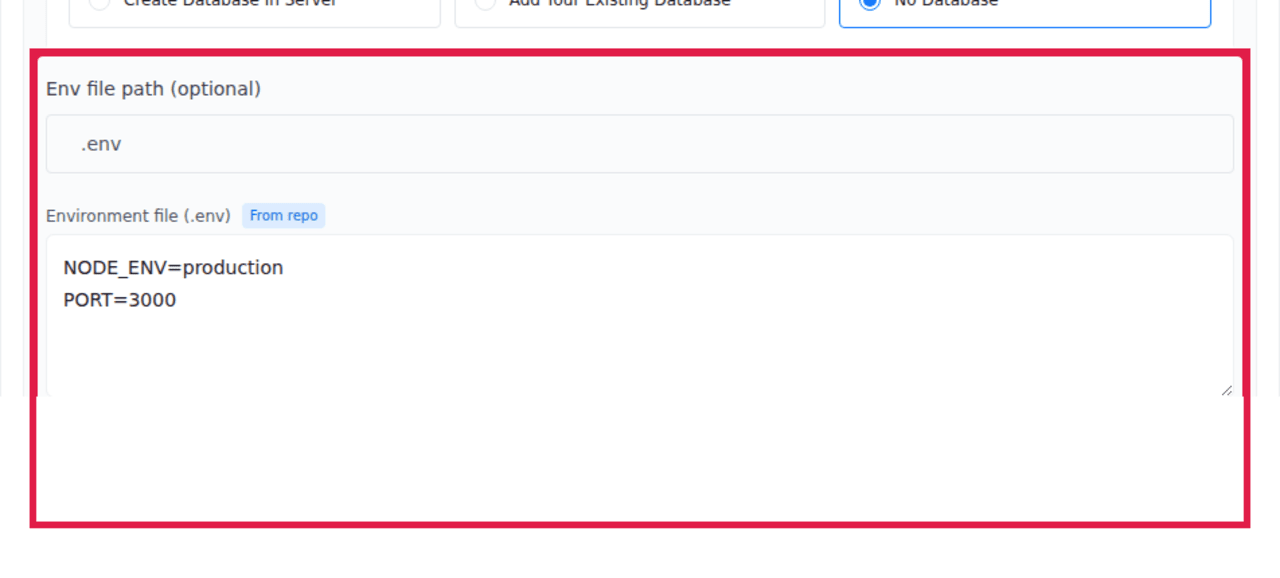
For example:
NODE_ENV=production
PORT=3000
Do not commit production credentials to Git. Enter them in xCloud’s environment editor and rotate any credential that was previously exposed in repository history.
Step 7: Review the build and deploy script
The Build & deploy script runs after xCloud pulls the selected branch. Review the generated commands and adjust them to match the package manager and build process used by your repository.
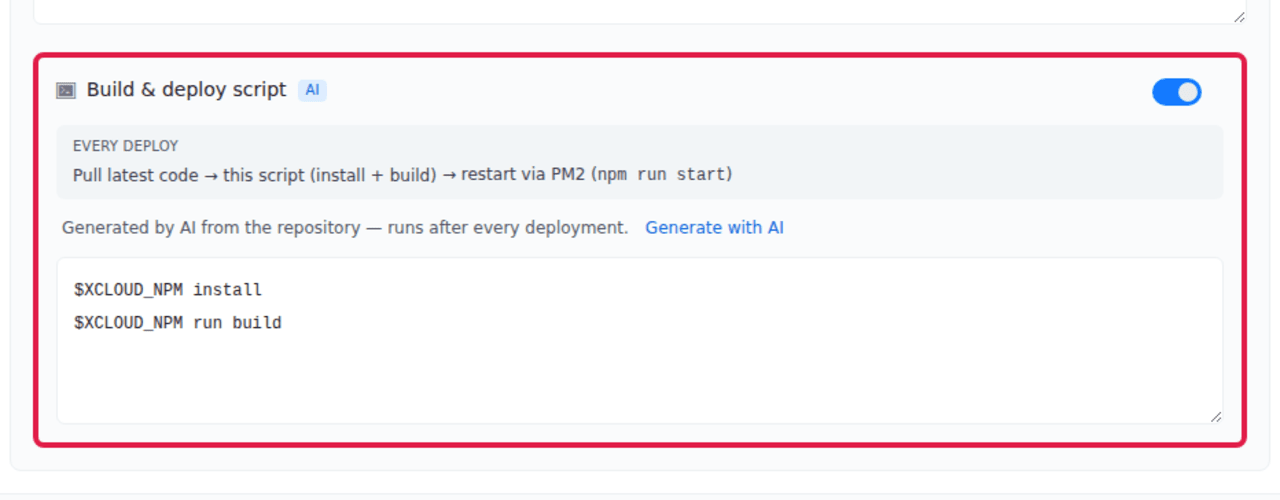
A common npm-based script installs dependencies and builds the project:
$XCLOUD_NPM install
$XCLOUD_NPM run build
Only keep the build command when the repository defines a build script. Applications that run directly from source may not need one.
Step 8: Review the summary and deploy
Check the summary before starting the deployment. Confirm the repository, application type, domain, and serving mode. Then select Deploy.
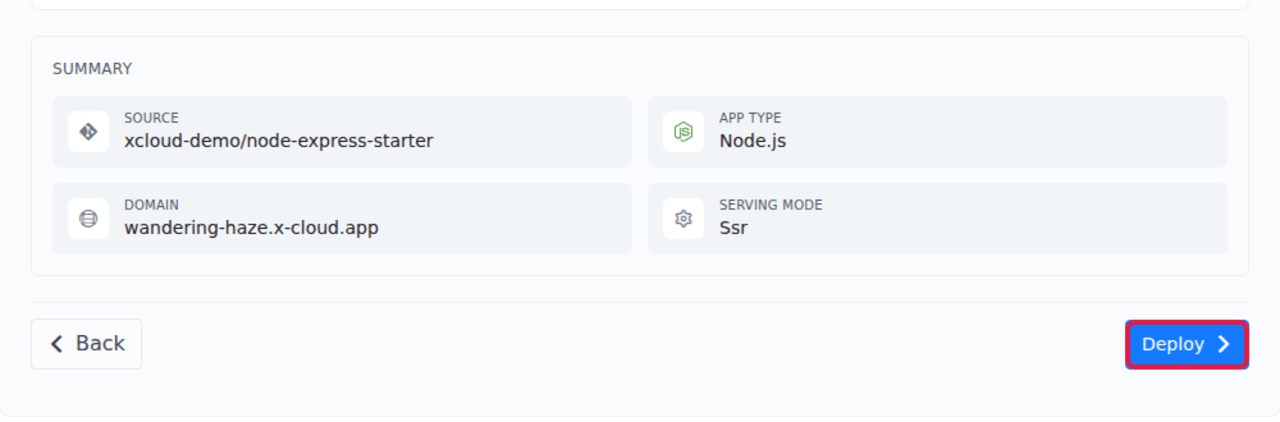
Wait for the deployment process to finish before opening the site. If the deployment fails, inspect the deployment log for the command that failed and compare it with a successful local production build.
Manage environment variables after deployment
Open the site and select Environment to review or update its runtime variables. Updating the environment of a Node.js application restarts the managed process so the new values can take effect.
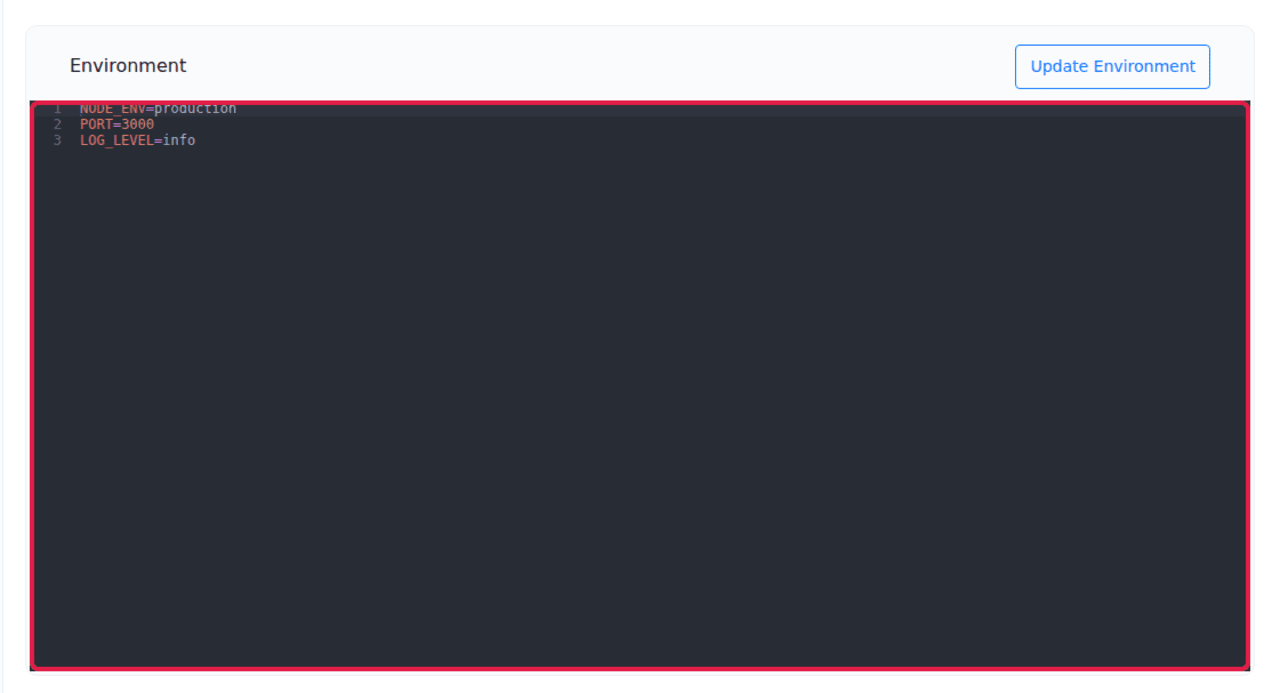
Use one KEY=value pair per line. Avoid adding comments or formatting that your application’s environment loader does not support.
Update SSR configuration
For an application that runs as a Node.js process, open SSR Configuration to update the application port or start command. The port must be available on the server and must match the port used by the application.
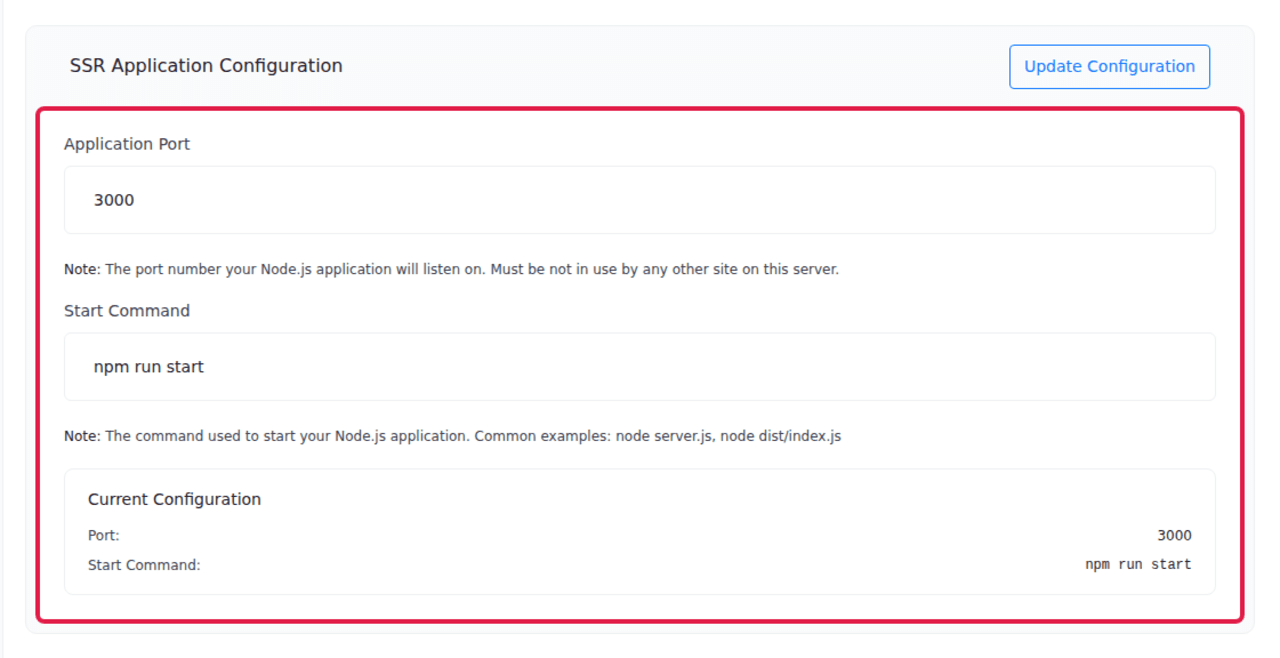
Updating SSR configuration restarts the managed process and may cause brief downtime.
Verify the deployment
After the deployment completes:
- Open the configured staging or live domain.
- Confirm the expected page or API response loads.
- Check the deployment log for build errors or missing packages.
- Confirm the application is listening on the configured port.
- Exercise one application-specific flow, such as loading a server-rendered route or calling a health endpoint.
Troubleshooting
| Symptom | What to check |
|---|---|
| Build command fails | Confirm the package manager, lockfile, Node.js version, and the scripts defined in package.json. |
| Application deploys but returns an error | Check the process start command, runtime logs, required environment variables, and external service credentials. |
| Application is unreachable | Confirm the serving mode and ensure the application listens on the configured port rather than only on a local-only interface. |
| Static assets return 404 | Confirm the build output directory and whether the application should use Static or Hybrid serving mode. |
| New environment values are not applied | Save the Environment page and allow the managed process to restart. |
Frequently Asked Questions
Which Node.js version should I choose?
Choose a version supported by the application and its dependencies. If the repository declares an engine in package.json, use a compatible version in xCloud.
Do I need a build command?
Only when the application compiles or generates production files. TypeScript, frontend bundles, and many frameworks require a build step; a small JavaScript API may not.
What port should I use?
Use the port on which the application listens, such as 3000. Keep the value consistent between xCloud’s Application Port, the PORT environment variable, and the application’s server code.
Can I deploy a private repository?
Yes. Select Private Repository, connect the supported Git provider, and choose a repository that the connected account can access.
Next steps
Once the staging deployment works, connect the production domain, configure DNS and SSL, add production environment values, and verify the application again on its final URL.
If a deployment gets stuck, the build or start fails, or auto-deploy stops triggering, see Troubleshooting Git Deployments — the .env file path pointing at a folder instead of a file is a common cause of a failed start.
Still stuck? Contact our support team for any of your queries.